
Admit it: you’re a little intimidated.
We’ve all been there. Even though you’re certain about your product and excited about your business, the idea of setting up an online store for the first time can seem a bit daunting. Credit card fees, sales taxes, flattering photographs of your products — it’s too much to digest at once, especially if you’re new to the idea.
The good news is, since other people experience the same overwhelming feeling, services like Shopify aim to make building an online store as simple as possible. All you need to get started is an email address, an idea, and a willingness to try something new.
Oh, and bookmarking this guide won’t hurt, either.
Step 1: Sign Up for a Shopify Account
One of the best things about setting up Shopify is that it requires absolutely no commitment for 14 days. You can sign up for their free trial to dip your proverbial toes in the water while you figure out the platform and work out the kinks. Here’s where the beauty of the Shopify system first introduces itself. Observe:
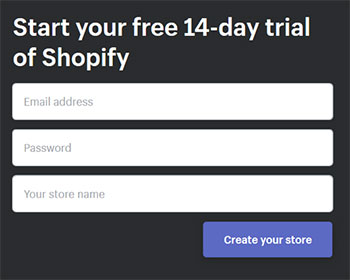
After a few questions about the size of your current business, you’re done — you’re ready to start sorting through your Shopify experience, figuring out the dashboard, even following through with the creation of a real, live online store.
Step 2: Add Product(s) to Your Store
From your dashboard, you’ll be able to click “Add Your Product.” If you imagine that the process on the other end of that click is complicated, full of advanced HTML wizardry and all sorts of new questions you never thought you’d have to answer, rest easy.
In fact, adding your own product is as simple as adding a new post in WordPress. It even looks similar:
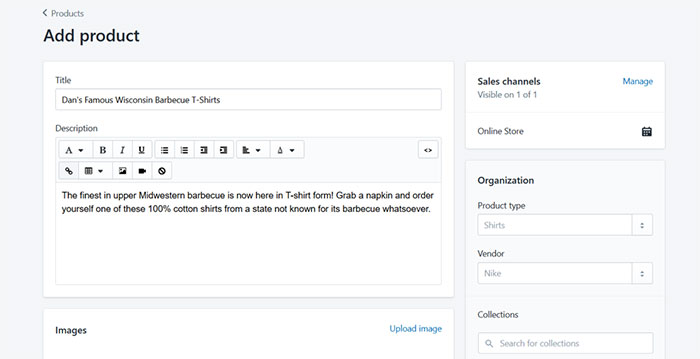
Title, description, product type, vendor — with any luck, you know the answers to these questions by now. And while it’s important to have pictures of your products up right away, you don’t necessarily have to have everything squared away to get a sense of what your store will look like.
Since you have two weeks of free use before your shop is set up, feel free to take your time with each step. Unless you have customers arming trebuchets outside your company doors, demanding an online shop right this minute… well, you’ll have the freedom to take each step at a time.
Step 3: Customize Your Shopify Store
Because Shopify keeps each step simple, your store design effort can be minimal if need be. But you can tinker around with store customization as much as you like, especially when it comes to the images and logos you upload to make your store unique.
Images with text overlays, choosing your featured collection, creating a slideshow — all of these features are available to you once you’ve added your products to the mix.
The key here? Quality photos.
If you haven’t had your products professionally photographed, you might want to think about scheduling a session. If you have a good camera yourself, now’s the time to take pictures on an empty background and upload them to populate your store template.
There’s more to customize than just the images you input. You can upload your favicon picture, link your social media accounts, select different fonts, even tinker around with the colors. Again, feel free to take your time and look at each variable by itself. There’s no rush here.
Is it possible to integrate Shopify with custom web design? Of course — in fact, Shopify encourages it by linking you with experts who can take this step completely off your hands. If you have more cash on hand than web design expertise, you might want to consider outsourcing this step for the best possible result.
Step 4: Prepare for Taxes
The good news about handling taxes with Shopify is that it’s a relatively straightforward process. The bad news is, you’ll want to have this process finished before you make your first sale. They’re taxes, after all.
The process is simple, but it varies depending on your location — if you’re in the United States or if you’re outside the United States, where the local taxes apply based on your retail location, etc. But don’t ignore this step as you set up your online shop. In fact, consider it validation that you are indeed a real shop: like any brick-and-mortar store, paying your taxes properly is paramount.
Step 5: Choose a Plan
If you’ve made a few sales — enough to justify setting up shop with Shopify permanently — then it’s time to have the online store version of “the relationship talk.”
Are you ready to commit beyond the free trial?
If so, then there are three basic tiers you get to choose from:
-
Basic Shopify: $29/month. Credit card rates are 2.9% + 30 cents for online. You’ll receive two staff accounts, which makes this a preferable way to get started if you’re a small organization with simple log-in needs.
-
Shopify: $79/month. So popular it has just one name, like Prince. 2.6% + 30 cents for credit cards. Your fee for external payment gateways will slice in half, from 2% to 1%.
-
Advanced Shopify: $299/month. Perfectly reasonable if you have a large operation and stand to save a lot on the volume of your transactions. 2.4% + 30 cents for credit card transactions and a flat 2.4% for in-person transactions. The external payment gateway fees slice in half again to a mere 0.5%.
The 24/7 support that you’ll likely need at some point — especially if this is your first rodeo — is included with all of the above, so don’t think you have to cannonball into the water with Advanced Shopify from the very start. You’ll have plenty of functionality with all three. The real question here is pure arithmetic: when you have enough volume that a fraction of a percent matters, then upgrading your Shopify pricing plan makes sense. Otherwise, keep it simple.
Test, Tweak, and Sell
Finally, continue tweaking your store as you go along. Set a calendar reminder to review and even test your store on a regular basis so that you’re not merely setting up shop, but you’re always building a better online presence for all your products. And every so often, look back at how you felt when you first considered building a store, and ask yourself this question:
That wasn’t so scary, was it?

